
PHOTO TIP from Always An Advenure
Rest assured, there are no rules in photography, only guidelines. However, some guidelines are rarely ever broken, like the straightness of a horizon.
Unfortunately, most people subconsciously put the horizon, or the main photographic subject, smack in the middle when taking their picture.
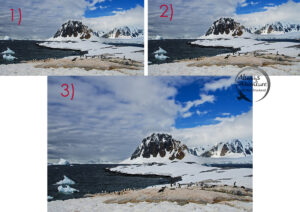
Even more offending are landscapes or scenes with crooked horizons. See example 1) below.
In my second example 2), I have straightened the horizon, but it’s dead center, in the middle of the frame.
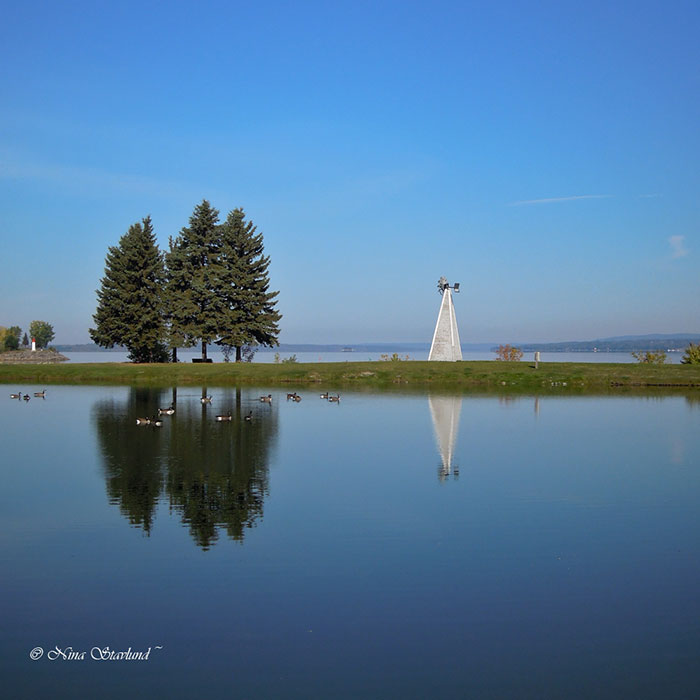
Avoid placing the horizon in the middle unless: a) you have a repetitive pattern like a reflection, b) you chose to crop a square format with lines radiating from the centre. Then it’s ok to have the horizon in the middle.
In example 3) this image uses the “Rule of Thirds”. My horizon is placed in the lower third of the frame, and then the rest of the scene fills the remaining upper 2/3 of the frame. Note how much more dramatic the sky is in this image compared to the image where the horizon is in the middle.
All editing programs, even simple ones like in your cell phone, should have tools that allow you to easily straighten the horizon. In addition, most cameras can display a grid on your viewing screen. This will help you visualize the “rule of thirds”.
It’s best to capture a straight horizon to begin with since you’ll loose pixels if you have to crop the image in order to correct it.

Like anything in life, rules were meant to be broken.
Although we prefer to see balanced frames in most landscapes, when you have reflections, horizons often work best in the middle (rather than using the rule of thirds or golden mean).
This creates a repeated pattern, and an even flow radiating outward from the centre of the image.
My example is from the foothills of the Rockies of Alberta – Middle Lake